Tuesday, October 28, 2014

I made Julie Fei-Fan Balzer's Watercolor Travel Kit


Okay, I love Julie Fei-Fan Balzer! I love her style, creativity, stencils, blog, art, journals and especially her energy. Someday, I will take a class from her in NY City!

Thank you, Julie for this awesome idea! Here is the link to Julie's Blog Post where I learned how to make the Watercolor Travel Kit: http://balzerdesigns.typepad.com/balzer_designs/2014/07/hey-dont-thow-that-away-altoid-tin-watercolor-palette.html

I look forward to getting Julie's Blog Posts in my mailbox EVERY DAY!! I, too am a huge fan of making new things out of old things....whether they be packaging, trash, found objects, etc. Julie came up with this cool idea for using an old ALTOID tin and DENTYNE gum packaging with the gum gone. And yes, it does matter which brand of gum.....it has to fit in the ALTOID tin.

My husband gave me his old ALTOID tins and I bought some DENTYNE gum. Already had the watercolors, sponge and water brush. I wanted to make 2...one for my granddaughter, a budding artist and one for me. I plan on making another for an artist friend of mine. YES! They make great gifts, too!

Thinking about gessoing the inside top and write color names. Sometimes they are hard to see.

Now I have to go shopping for some more cheap watercolors and I need a water brush...what a cool invention!


Our granddaughter who has to travel to see us LOVED the kit ... we painted all afternoon!


Friday, October 24, 2014

"Art, Play, Love" Citrasolv Contest

This washi card made with Citrasolv papers received an "Honorable Mention"

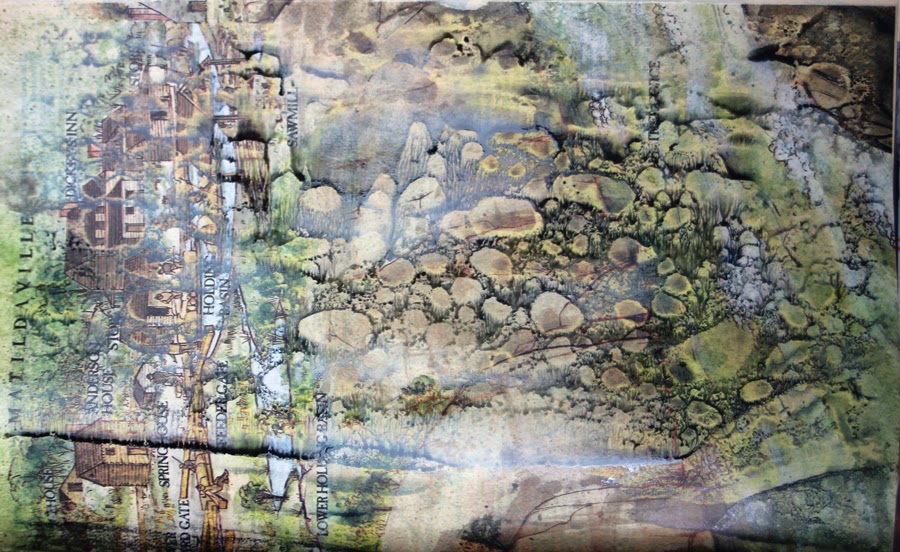
Have you heard about Citrasolv Art yet? It's been around for awhile....don't know who came up with the process, but they're brilliant!  Citrasolv is an all natural degreaser. When you paint or spray National Geographic pages with it....they dissolve in the coolest possible way. Basically, you are creating abstract art. (see my posts on July 25 and June 13 for more details)

I love the smell of this citrus concentrated cleaner, but it can be quite powerful

It's the clay based paper or ink that makes this process work. Doesn't work with mags before 1970

Half the fun is finding the National Geographic magazines. I found my first bunch on EBAY for a very good price. But, I have been finding free ones ever since. Thanks to my mom for keeping an eye out for me, too! Check your library's magazine free bin, or your nearest Transfer Station. I always check there, because I found a stack of 11 magazines there once!! In the future I'm hoping to teach classes on this process. It's so much fun because you don't know what's going to happen or how each page will turn out.

Below are three other entries I made into the "ART, PLAY, LOVE" contest this summer.


If you go to Citrasolv.com you will find an "artist support" section that explains all the ways you can use Citrasolv artistically. They also sponsor contests about 4 times a year. I entered one this past summer and received an "Honorable Mention". I am beyond thrilled and, of course, have entered another contest. :) They'll be a post on that in the near future.

If you're looking for Citrasolv, the quickest way to get it (without shipping) is your nearest health food store.

Tuesday, October 21, 2014

Painted Paper Bowls

While I was writing my last blog post (October 20) about the different ways to make paper bowls, I realized I needed a pic of one in progress. So, I blew up a balloon and grabbed the closest thing....scraps of painted paper towels. These were unintentional paintings....just haphazard cleanup during my gelli print making crazes. Here's the pic I posted...


Well, I had to finish it....so I glued more painted paper towels down. As mentioned in previous post, putting a rock or something heavy inside the plastic cup is very important. Otherwise, like me, you'll drop it, get glue on the floor and hair and goodness knows what else on the balloon. :)  Another thing I learned working with paper towels...they soak up a lot more glue than tissue paper. Again, the recipe I use is (3 parts) clear Elmer's to 1 part water.


Don't you love the texture on this? Maybe you notice the dripping marks on the bottom of the balloon. Well, I wasn't thrilled with all the white spots left on the painted towels, so I did 3 drippings of acrylic paint: (My Studio) Lily Pad Green, Mediterranean Blue, Purple. Love these colors! Had no idea how it would turn out, but the pick above is right after the drippings. Then I thought, I better seal this....so once it was dry I covered it in Golden's Regular Gel Gloss.


So now it's a little shinier. I love the color combinations and from a distance you can't even tell it's made out of paper. But, it's quite sturdy! No paper bowl is complete without a votive. You can put anything you want in them. But, I love the light shining through. SO, the votive picture did not work. I tried a couple of things and am not thrilled with the way it looks, but I wanted you to see the bowl's transparent areas where the paper is thinner.....which gave me a cool idea for the future!

Here is the bowl over an open bulb in the ceiling.....now it's a lamp! No, this would be dangerous!!!


Here is the bowl underneath my "natural" light lamp. It looks other-wordly!


Here is a closeup of the inside of the bowl


Pretty on the inside and out!


Monday, October 20, 2014

Making Tissue Paper Bowls


STILL SHOTS WILL HAVE TO DO FOR NOW
I know I need to start making videos of my art and craft escapades, and I will. But, for now I'm trying to document everything with still shots. And of course, in my creative frenzy I occasionally forget to take a pic of something before I destroy....I mean alter it.

ART and CRAFT CLASSES
I'm scheduled to teach a few Art and Craft classes at a couple of Senior Centers here on the Cape. I'm hoping to teach a couple of different bowl making classes. This is how I ended up playing with tissue paper bowls for a couple of weeks. And I'm glad I did, because even though there are many videos and blogs online showing "how to"...... I like to do things my own way and experiment with what will work the best....which for Seniors is fast and easy.

MAD ABOUT TISSUE PAPER
Not sure why I thought it necessary to put so much effort into it since I have an entire closet full of tissue paper.....but, I printed my own from some autumn leaf backgrounds I had just made. They were really cool looking. And yes, this is the photo I forgot to take! :( What is it about tissue paper that is so appealing? Is it its transparency, delicateness, color possibilities, or ability to wrinkle and make cool textural effects? Yes, to all of the above. I have been working with and SAVING tissue paper for a couple of decades. Because of this class that I may teach, I finally organized my stash by color and pattern!!


THE BOWL METHOD
So, I ripped up my beautiful autumn tissue papers....not into neat little strips, but willy-nilly because that's how I roll. Most of the "how to's" showed working with balloons, but I didn't have any balloons handy and I was on a mission, so I found some different sized bowls and covered them with saran wrap. If you use the bowl method, you have to use the saran wrap unless you want to glue the tissue paper permanently onto the bowl....which you might. I used the Elmer's glue recipe for this bowl (find below).

My autumn tissue paper glued over a bowl covered with saran wrap......drying

Done drying, now have to take saran wrap off bowl

Was really hard to separate....ripped tissue paper in a couple of places

Put a faux votive (never real ones!!) inside the bowl and took photo at night.....so pretty!

THE BALLOON METHOD
The balloon method is really quite simple and a lot more fun, I think. You can make the balloons whatever size you want....that's cool.....and then scotch tape the balloon to a big plastic cup. (see pic below) I learned that it helps if you put a rock or something heavy inside the plastic cup to keep it from tipping over. I only used the Elmer's glue recipe for the balloon bowls. Amazing! The bowl was perfectly shaped and super sturdy!

This is an 11" balloon that was not blown up all the way


I glued strips of painted paper towels onto the balloon just to show you what it would look like

GLUE MATTERS
I am not a novice when it comes to glues, but I'm not afraid to experiment and make big messes. LOL But, there's a glue for every project and I wanted to try a couple of different methods to see what worked best. I tried soft gel and Mod Podge (see pics below). It was harder to separate the saran wrap and tissue paper and although it's very sturdy, it almost feels like cloth....I didn't like the end result. But, you might, so don't be afraid to try it. I feel, hands down the old Elmer's glue recipe worked best....especially with the balloon method. Recipe: 3 parts glue - 1 part water - stir.

Either works, I prefer the clear.....save leftover glue recipe forever in a covered container

THE END RESULT
I'm very glad I tried these different methods and glues, because I always learn things. Everyone should have fun and experiment to realize what works best for them.

Here I used some cool "glitter" tissue paper my mom gave me - I learned you need something to support the bowl ... last picture is this bowl all finished

Bowl method: I used pieces of several different "Valentine-themed" tissue papers and Elmer's glue

Another Valentine-themed bowl - see how it looks different (and shiny) made with soft gel (gloss

This is my favorite ... I used Christmas-themed tissue paper AND Elmer's - look at the lovely shape!

Bowl Method: Used strips of jewel-toned paper and Elmer's ... see the difference in shape??

Thursday, October 16, 2014

I'M BAAAAAACK!

THE SUMMER IS OVER....THANK GOODNESS!!
My very first post on this blog was titled: "2014 - Year in Transition". Hmmmm.....Now that it is October, I think I would edit the title to read: "2014 - The Hellish Year of Death and Trauma". Wow....no melodrama here!!! But, I was hoping life would have some normalcy by the fall and fortunately, that is the case. Fall is my favorite time of year and I'm enjoying as much time outdoors as I can, in the woods and mostly at the beach. What's the point of living on Cape Cod if you're not going to enjoy Nature in all its glory?

My favorite beach....Cold Storage Beach in Dennis

Always great sunsets at Mant's Landing in Brewster

 DOES YOUR PALETTE CHANGE WITH THE SEASONS?
When I paint or print with the gelli plate, I'm always drawn to the blues, greens and purples. I never, ever tire of these colors. But, when Autumn arrives bringing with it the warm palette of oranges, reds and yellow with a touch of green....I start playing with those colors. I really believe being surrounded by the changing leaves is my inspiration.

Real leaves scanned into my computer

I USE REAL LEAVES ON MY GELLI PLATE
Yes, I'm a leaf freak year round....this is true. But, when they start changing I bring them home to my Studio to bask in their beauty. Out comes my 8" x 10" gelli plate (I have other sizes now....more on that in another post!!) Speaking of gelli printmaking...I love Flikr and I recently joined a gelli printmaking group....if you're interested in seeing some gorgeous prints, check out this link: https://www.flickr.com/groups/gelatinprintmaking/pool


I HAD NO PLAN
I spent a couple of days slapping leaves, a fern or two and lots of red, orange and yellow paint around on my gelli plate. (Those 3 colors are analagous which means they are next to each other on the color wheel and are soothing!) I had nothing in mind....I was just playing and relaxing....SO much fun! But, I was really pleased with some of the prints and I thought...."oooh, these would make great backgrounds for my ETSY Shop." https://www.etsy.com/shop/TheDigitalStash

These and other autumn products available at 

https://www.etsy.com/listing/201933908/painted-autumn-leaves-5-digital-12x12


A sample card made with one of the backgrounds by using leaves as masks


More fun with layer masks in Photoshop

This was my favorite print that I am going to do something with....did not put in my ETSY Shop

Friday, July 25, 2014

More Fun with Citra Solv

I first talked about Citra Solv on June 13th, here:
http://thedigiartblog.blogspot.com/2014/06/the-computer-is-one-of-my-art-mediums.html

When I first mentioned Citra Solv, it was my very first experiment and I forgot to take pics during the process. This first pic is from that first experiment showing SOME of the pages drying on my floor.

Drying on my tiled cellar floor on vinyl tablecloth. When I got some ink on my floor, it came off with Citra Solv!!!

Also from first experiment.....learned using bubble wrap with Citra Solv will dissolve the bubbles right into paper!

Here's what the Citra Solv looks like. There might be other "flavors", but it MUST be concentrated!
These mags are made with clay paper, which is why this amazing process works.
 I finally got to spend an entire afternoon playing with Citra Solv and 3 National Geographic magazines. (thanks for finding me more mags, mom!) Each time I "play" with this process I learn something new. I have already viewed every video on YouTube about this technique more than once! (I highly recommend this!)  I need to do my own video, I know....maybe at the end of the summer? But, I did take some pics before my hands got too messy. :)

Here's pic of spray bottle I used and how I sprayed....obviously, I need to do a video on this!

Unfortunately, I didn't pay attention to how long it took to get to this point, it will vary. Start checking after 10 min.


Towards the end I started experimenting with stamping INTO the ink and using the ink while it was still wet.
THINGS I'VE LEARNED SO FAR:
FIRST...working with 3 magazines was too much for ME.....drying happens too fast to put all of my attention onto each page. And you do want to look at each page, because you have no idea what each will end up looking like. Believe me, when you do this, you will get lost in this process. It is SO mesmerizing. I love patterns and I love abstraction and you will get lots of that!

SECOND...I prefer spraying the Citra Solv to "painting" the pages with it. I also learned that spraying outside will give you different results than if you do it inside. I know this because an hour into my playing, it started to rain and I brought everything into my cellar. (with lots of ventilation....although I love the smell!) The reason you get different results I believe, is that it was a little windy and I'm not sure the pages were getting completely covered. On the other hand, when I painted them with Citra Solv they got too wet.....which of course was probably MY fault. This is NOT an exact science! Have fun experimenting.

THINGS TO KNOW:
1. The National Geographics must be post 1970. Have tried 80s, 90s and 2009....they all worked!
2. The process is affected by temperature and humidity.....humidity may slow down drying time,
    and Citra Solv prefers the warmer temps.
3. Citra Solv dissolves thinner plastics.
4. I found my bottles of Citra Solv at the health food store.
5. Tear out all ads from magazine, they will not work with Citra Solv.

This is an ongoing experiment, I will be blogging again and hopefully doing a video by summer's end. In the meantime, I have already been scanning in the pages and altering them. There are SO many more things to do with these pages!!!

Friday, July 18, 2014

Art Journal Therapy

Hello my Art Peeps. I have not forgotten about my blog, it's just been a real crappy summer. Nothing horrible....just lots of stress with medical issues (not mine) and if I didn't have my art, my art supplies and my art journals, not sure where I'd be right now.....perhaps the loony bin?

I read Julie Fei-Fan Balzer's blog every day. She's amazing! (see her widget on the right)
She advocates spending just 10 minutes art journaling every day. It's good for you. And you know, she's right! Art Journaling reminds me of the "Morning Pages" from Julia Cameron. I used to do those, but got out of the habit. Now I have more time and it's important for me to make more time, so I'm Art Journaling every day and I'm loving it! Also, my creative juices are flowing like crazy!

Below, are a few pics of journal pages and a journal cover.


Most of my journal pages are painted with the brayer when I'm working with my gelli plate. Here I also used my 2 favorite masks, my woman and my bird. Then I just played with my markers. It's not finished, but I'm enjoying the colors and the texture. Who knows what it will turn into?


Never been a fan of drawing people, but one day I decided to spend the day sketching faces. I went on Pinterest and typed in "Art Journal Faces" for inspiration and just drew my own. She's not finished either, but I like her expression.


Still a fan of blue, green and purple. I have one whole journal dedicated to those colors. And still prefer organic shapes to geometric ones. But, that could change! :)


I have 4 journals I'm working in simultaneously and I think I'm going to start another one this weekend. But, it will be a Citra Solv journal. More on THAT later! This is the only cover that feels finished to me. I got the cool texture from gluing tissue paper on top of the paint (once dry). The tissue paper had fibers in it....so cool!