Friday, September 30, 2016

The Art of Well Being

EVERY LEAF SPEAKS BLISS TO ME

Two things bring me calmness, peace of mind and a feeling of being one with the Universe: Communing with Nature and Creating. I have been very fortunate to be able to be close to Nature 
my entire life. So, Nature is very important to me and obviously very inspiring as it shows up 
in my Art all the time!

The very first thing I did when I received my Gel Press ® plate, was make lots of prints with 
real leaves I had collected from the woods. From that moment on, every time I walked in the 
woods my mind was automatically searching for cool natural textures - and I realized when 
I got home from these walks, I was completely relaxed and full of creative ideas! 
It was a wonderfully meditative exercise.

For today's blog hop, I'm going to relive my wonderful walks in the woods by making a pillow 
with the help of my 12" x 14" Gel Press ® plate and bring Nature inside my home!

Supplies you will need: 

•REAL leaves
•brayer
•acrylic inks (in Fall colors)
•2 oz. spray bottle
•acrylic paint (I used green and copper)
•piece of white cotton bigger than 12" x 14" (I used an old white pillowcase)
•iridescent bronze fluid paint
•fine tip applicator
•scissors
•sewing machine
•piece of material (bigger than 12" x 14") for back of pillow
•polyfil

I sprayed yellow, orange, green and red acrylic ink right onto Gel Press ® plate. I prefer spraying onto the plate because it allows me more control....if I see an area I don't like, I can wipe it off.


Here is what the white piece of pillowcase looks as it soaks up the the acrylic inks.


I repeated the process a second time to fill in the white gaps and add more color.


Here is the pillowcase - dried - after second application.


I used a brayer to spread green and a little copper acrylic paint on the 12" x 14" Gel Press ® plate. Then I placed the real leaves (using them as masks) onto my plate, leaving space for a poem. 


This is what the pillowcase (front of pillow) looks like after pressing onto above plate and dried.


I found a piece of material that went with my gel printed fabric and cut both of them to 12" x 14". The pillow will be smaller as I used up a 1/2" on all sides for a seam allowance.


I placed both fabrics face to face, pinned and machine-sewed on all sides, leaving some room for stuffing. I stuffed with polyfil and machine-sewed it closed. I put Iridescent Bronze Fluid Acrylics in a fine tip applicator and wrote the poem onto the pillow.

 Now I have a memento of my walk in the woods.


Hope you enjoyed this technique! Before you try it out, go check out more cool, creative ideas on our Blog Hop!!


Visit us on Facebook - Gel Press® JunkiesPinterestYouTubeGel Press® Blog

Thanks for participating in our HOP!

Kitti Scibelli
Gel Press® Creative Design Team 

Thursday, September 15, 2016

Ocean Inspired Mosaic Frame made with a Gel Press ® Print

Ocean inspired mosaic frame

I love making mosaics, but it can be time consuming, messy, and occasionally painful! :)

I'm sure you've heard of paper mosaics.  I’m going to show you how to make a gorgeous paper mosaic made from a Gel Press ® print.

Here's the print I made by painting (with a paintbrush) right onto my 8" x 10" Gel Press ® plate.
I used my favorite colors of acrylic paint...

Paper mosaic

Then I cut my print up into squares and rectangles, glued them down on the frame and added Diamond Glaze to each piece. It's amazing how much they look like glass tiles!!

Click on any of the pics to go to my Gel Press ® blog post for all the details!!! :)

Gel press print becomes mosaic

Thursday, August 25, 2016

Make Beautiful Clean Up Prints with Gel Press ®

With all the kiddos heading back to school, Gel Press thought we should take you back to the basics! Please visit each blog for an idea or technique that you may or may not have seen before ... Happy Hopping!

A clean up print on a Gel Press ® plate is a great way to clean off your plate without having to use (non-alcoholic) baby wipes or soap and water. It's fast, easy and fun!!

Today I'm using the 8" x 10" Gel Press ® Plate
 http://www.gelpress.com/store/p22/8%22_x_10%22_Plate.html
Other supplies you will need:
•acrylic paint
•brayer
•stencils and masks
•paper - I used black and yellow
•stamps
•cutting tool

In order for this technique to work and get great results, 2 things are necessary. The paint on your Gel Press ® plate HAS to be dry before you brayer wet paint over it, and should be a contrasting color to the dry layer. It's also important to keep the color of your paper in mind as well.

Now that you understand the basic process, I'm going to show you how to make INTENTIONAL clean up prints!

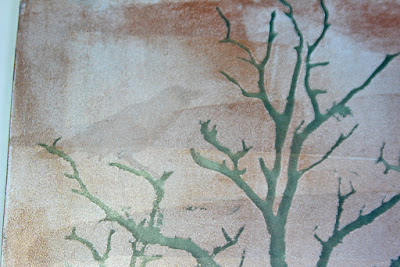
First, I decided I would use black paper and white paint. I put my 3 tree masks down on the clean
8" x 10" Gel Press ® plate, then brayered white paint on top of the masks. I immediately took the masks off and let the white paint dry. It can be very humid where I live, so I give it plenty of time to dry.

Gel Press plates

Once the first layer dried, I brayed copper paint on top and added my raven mask (which is hard to see because it was clear). I immediately pressed the black paper to this wet paint. I pressed hard on the paper and plate and gave the paper extra time to soak up ALL the paint.

gelatin monoprinting

This is the result. The raven is black because the paper is black.

tree and bird masks

I wanted to make a card out of this, so I cleaned up around the raven. I cut it to card size and put a round mask over most of the card, painted black around it to give the impression of the moon. Then I used my Trick or Treat stamp. Spooky!


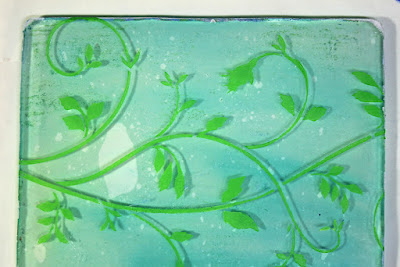
Here's the same technique but with a stencil. I used a large Martha Stewart stencil bigger than the
8" x 10" Gel Press ® plate. I put it down on the clean plate, brayered green paint over it, then lifted the stencil off and let the paint dry.

monoprinting with masks

I decided to experiment and brayer blue paint (under mixed) over the dried layer. They are very close on the color wheel and I wasn't sure I would be able to see the stencil image. I decided to use yellow paper to make the clean up print and I put my butterfly mask over the blue paint so the butterfly would be yellow.

Gel Press printing with layers

I was very pleased with the blue - green paint combo. Never be afraid to experiment! All that was left to do was stamp.


Hope you enjoyed this technique! Before you try it out, go check out more cool, creative ideas on our Blog Hop!!

Ann  
Cindi  
Keri 
Kitti you are here
Lea hop here next
Gel Press

Visit us on Facebook - Gel Press® JunkiesPinterestYouTubeGel Press® Blog

Thanks for participating in our HOP!

Kitti Scibelli
Gel Press® Creative Design Team 

Monday, August 8, 2016

It's a Wrap for #ICAD2016

This was my very first #ICAD2016, but it will not be my last. A big thank you to Tammy Garcia who started the Index Card Challenge 6 years ago. Here's her FB ICAD2016 link: https://www.facebook.com/groups/ICAD2016/


I started a Mixed Media Artists Group here on Cape Cod (MA). And that's how I found out about the Challenge!! It's just what I needed to stretch and push my Creative muscles. :) I also posted on Instagram every day and met a lot of amazing artists and photographers. It was a really great experience to share my Art, get feedback and give feedback to others.

index card mixed media art


An Art teacher once told me that one way to grow as an artist is to work in a series. Now I know why. Thanks to the ICAD Challenge I have grown and am really looking forward to next year's challenge!


#ICAD2016 challenge

After creating 61 Index Cards, I wanted to display them all, which is pretty much impossible. But, I had recently put up a kind of clothesline to dry some artwork and thought I would put up all the cards with clothespins and then take photos and a video. Of course, as I was putting the last few up....the wind picked up!

I can't get the Video to load here on Blogger .... will figure it out eventually, but if you haven't seen it, I posted it on Instagram: https://www.instagram.com/p/BIlGqPYB-O4/?taken-by=kittiscibellidesigns


Saturday, August 6, 2016

Prisma App - I love you!

Art Photography Prisma App

The 100 Day Challenge

I also participated in the #the100daychallenge - which challenged people to create every single day for 100 days. It sounds daunting, but really can be accomplished in no more than 15 minutes per day, depending on your medium.


Arting for 100 Days

I tried to make it easier on myself by calling my challenge #artingfor100days - which left the kind of creating I did open ended. I am a mixed-media artist after all... so I have quite an eclectic 100 creations!

Prisma App Art Filters

Prisma, the Wonder App

I did all of my posting on Instagram and really enjoyed viewing and chatting with the other artists and creatives! I learned many things over the 100 days including discovery of a newer APP called Prisma!  Be forewarned, it is highly addictive! (isn't all Art?) I really love the painterly and abstraction filters...


Prisma App Art Filters


Prisma App Filters


Saturday, July 30, 2016

Collaging on Index Cards

I cannot stop collaging!

Why? Because I'm participating in the Index Card A Day project (#ICAD2016) for 61 days. I had no idea how much fun it would be and how much I would enjoy working with this smaller size. This is exactly why trying new things and challenging ourselves is such a good thing. :)

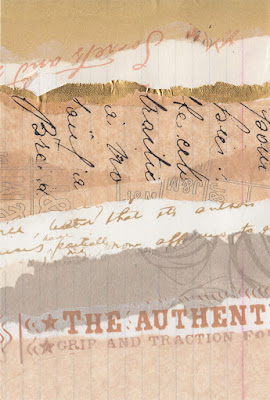
Here's a few of my Index Card Collages, before some of them were Gel Printed. :) I adhered to a neutral palette of a variety of pages and just let my intuition take over....it's so much fun! All 61 of my Index Cards are on Instagram - feel free to check them out and follow me if you'd like.
https://www.instagram.com/kittiscibellidesigns/

collages on index card


index card a day challenge

index card paper collages

Gel Press and ETI Resin Blog Hop


ETI Resin blog hop win prizes


If you're into Gelatin printing and/or ETI Resin, check out these very creative blogs loaded with amazing project ideas! Hop onto these blogs, and leave a comment to enter to win until 10pm Sunday night. (July 31, 2016)

http://www.gelpressblog.com/gel-press-eti-blog-hop/

Thursday, June 30, 2016

It's Official ... I'm a Gel Press® Designer!

I'm very excited to be part of the Gel Press® Creative Team with all of their amazing talent and monoprinting ideas.

gelatin printing with gel press 8" plate


Today, my first blog post went up on the Gel Press® blog... learn how to make the wooden plaque above and check out all the other posts for fabulously creative gel printing ideas!!

Check it out:  http://www.gelpressblog.com/love-laugh-friends-plaque-with-gel-press/